Note
Opening a repository at github.dev opens it in VS Code for the Web, the browser-based version of VS Code. For more information, see VS Code for the Web in the VS Code documentation. VS Code for the Web is not available on subdomains of GHE.com, such as octocorp.ghe.com.
About VS Code for the Web
VS Code for the Web is a lightweight editing experience that runs entirely in your browser. With VS Code for the Web, you can navigate files and source code repositories from GitHub, and make and commit code changes. You can open any repository, fork, or pull request in the editor.
VS Code for the Web is available to everyone for free on GitHub.com.
VS Code for the Web provides many of the benefits of Visual Studio Code, such as search, syntax highlighting, and a source control view. You can also use Settings Sync to share your own VS Code settings with the editor. See Settings Sync in the VS Code documentation.
VS Code for the Web runs entirely in your browser’s sandbox. The editor doesn’t clone the repository, but instead uses the GitHub Repositories extension to carry out most of the functionality that you will use. Your work is saved in the browser’s local storage until you commit it. You should commit your changes regularly to ensure that they're always accessible.
You must be signed in to GitHub to use VS Code for the Web.
Opening VS Code for the Web from GitHub
You can open any GitHub repository in VS Code for the Web in any of the following ways:
-
To open the repository in the same browser tab, press . while browsing any repository or pull request on GitHub.
To open the repository in a new browser tab, press >.
-
Change the URL from "github.com" to "github.dev".
-
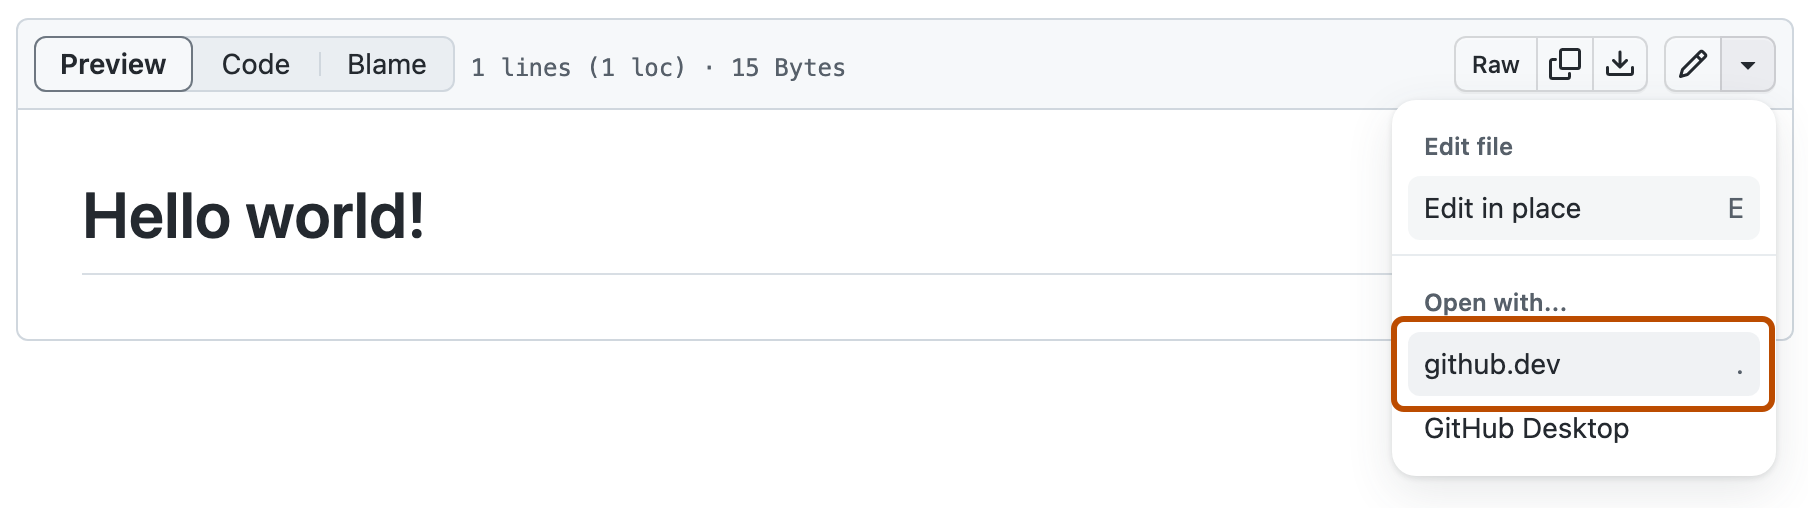
When viewing a file, select the dropdown menu and click github.dev.

Codespaces and VS Code for the Web
Both VS Code for the Web and GitHub Codespaces allow you to edit your code straight from your repository. However, both have slightly different benefits, depending on your use case.
| VS Code for the Web | GitHub Codespaces | |
|---|---|---|
| Cost | Free. | Free monthly quota of usage for personal accounts, see GitHub Codespaces billing. |
| Availability | Available to everyone on GitHub.com. | Available to everyone on GitHub.com. |
| Start up | VS Code for the Web opens instantly with a key press and you can start using it right away, without having to wait for additional configuration or installation. | When you create or resume a codespace, the codespace is assigned a VM and the container is configured based on the contents of a devcontainer.json file. This set up may take a few minutes to create the environment. See Creating a codespace for a repository. |
| Compute | There is no associated compute, so you won’t be able to build and run your code or use an integrated terminal. | With GitHub Codespaces, you get the power of a dedicated VM on which you can run and debug your application, and you can use the terminal exactly as you would in your local environment. |
| Extensions | Only a subset of extensions that can run in the web will appear in the Extensions View and can be installed. See Using extensions. | With GitHub Codespaces, you can use most extensions from the Visual Studio Code Marketplace. |
Using source control
When you use VS Code for the Web, all actions are managed through the "Source Control" view, which is located in the Activity Bar on the left hand side. For more information on the "Source Control" view, see Version Control in the VS Code documentation.
Because VS Code for the Web uses the GitHub Repositories extension to power its functionality, you can switch branches without needing to stash changes. See GitHub Repositories in the VS Code documentation.
Create a new branch
-
If the current branch is not shown in the status bar, at the bottom of your codespace, right-click the status bar and select Source control.
-
Click the branch name in the status bar.

-
In the dropdown, either click the branch you want to switch to, or enter the name for a new branch and click Create new branch.


Commit your changes
-
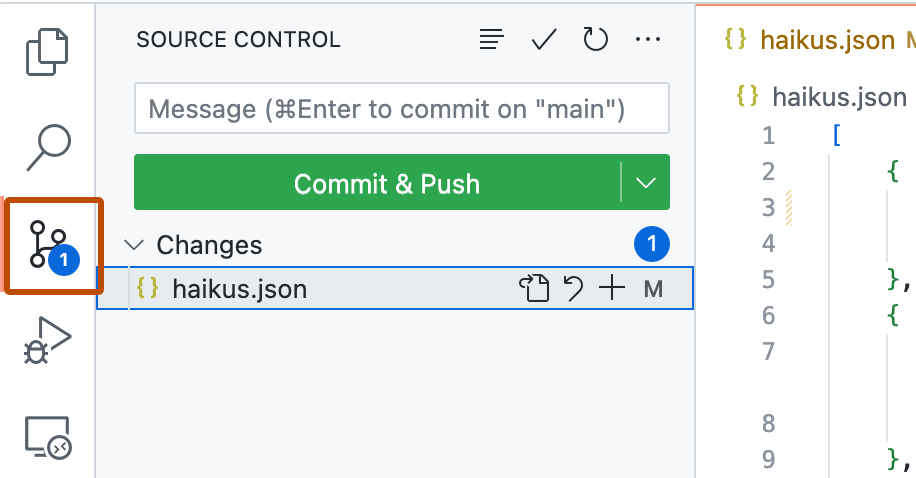
In the Activity Bar, click the Source Control view.
-
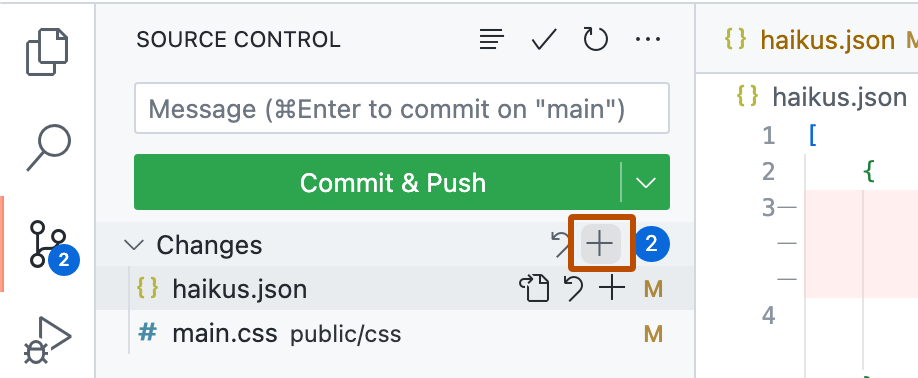
To stage your changes, click next to the file you've changed, or next to Changes if you've changed multiple files and you want to stage them all.
-
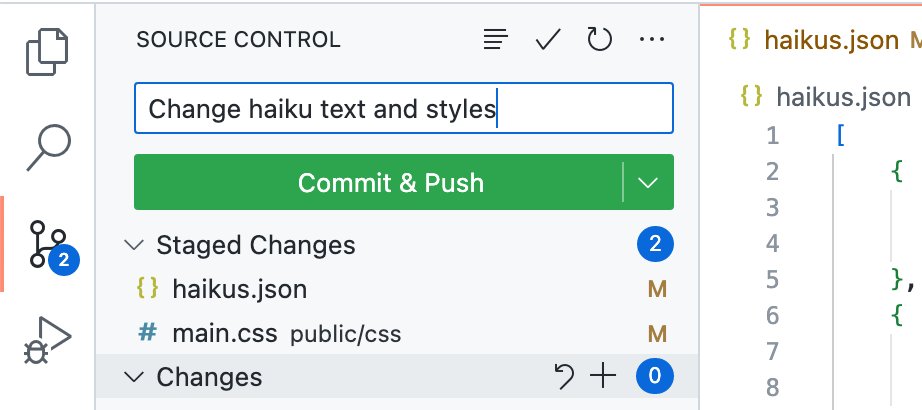
In the text box, type a commit message describing the change you've made.
-
Click Commit & Push.
Your changes are automatically be pushed to your branch on GitHub.


Create a pull request
-
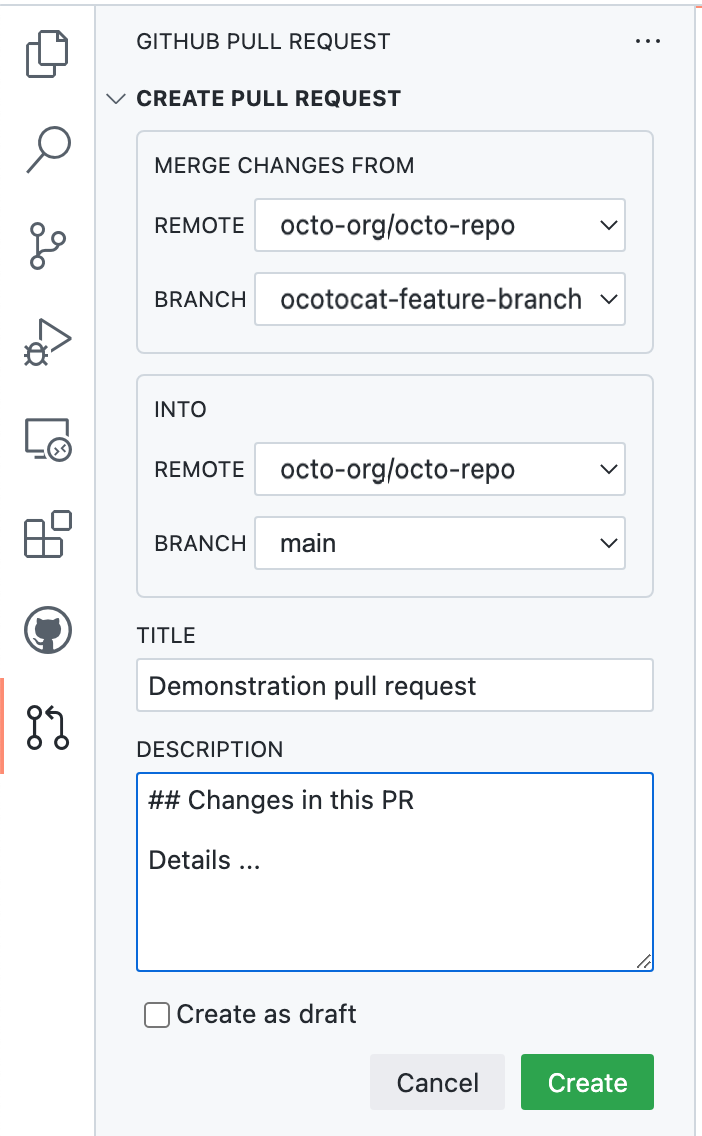
After you've committed changes to your local copy of the repository, click the pull request icon at the top of the "Source Control" side bar.

-
Check that the local branch and repository you're merging from, and the remote branch and repository you're merging into, are correct. Then give the pull request a title and a description.
-
Click Create.


Working with an existing pull request
You can use VS Code for the Web to work with an existing pull request.
- Browse to the pull request you'd like to open in VS Code for the Web.
- Press
.to open the pull request in VS Code for the Web. - Once you have made any changes, commit them using the steps in Commit your changes. Your changes will be committed directly to the branch, it's not necessary to push the changes.
Using extensions
VS Code for the Web supports VS Code extensions that have been specifically created or updated to run in the web. These extensions are known as "web extensions". To learn how you can create a web extension or update your existing extension to work for the web, see Web extensions in the VS Code documentation.
Extensions that can run in VS Code for the Web will appear in the Extensions View and can be installed. If you use Settings Sync, any compatible extensions are also installed automatically. For information, see Settings Sync in the VS Code documentation.